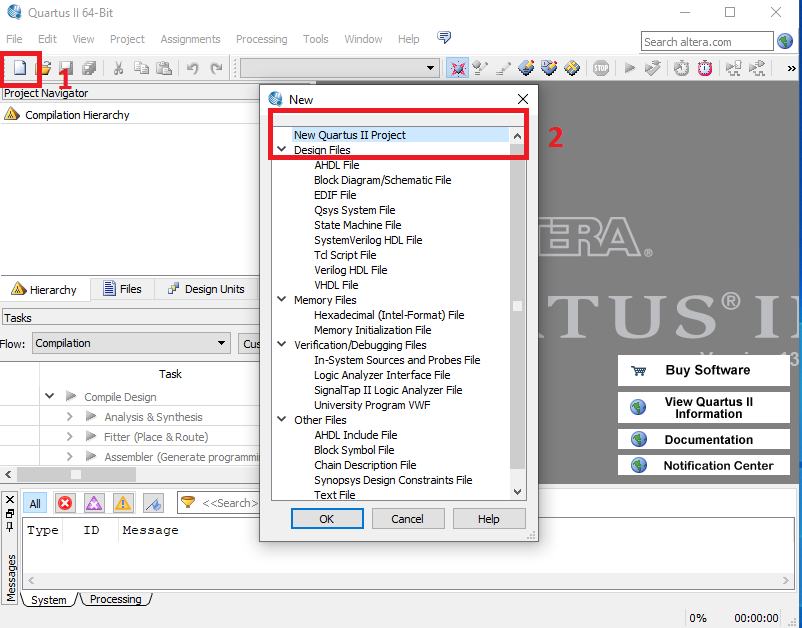
In our last tutorial we downloaded and installed the quartus web edition, now it is time to test our first project.
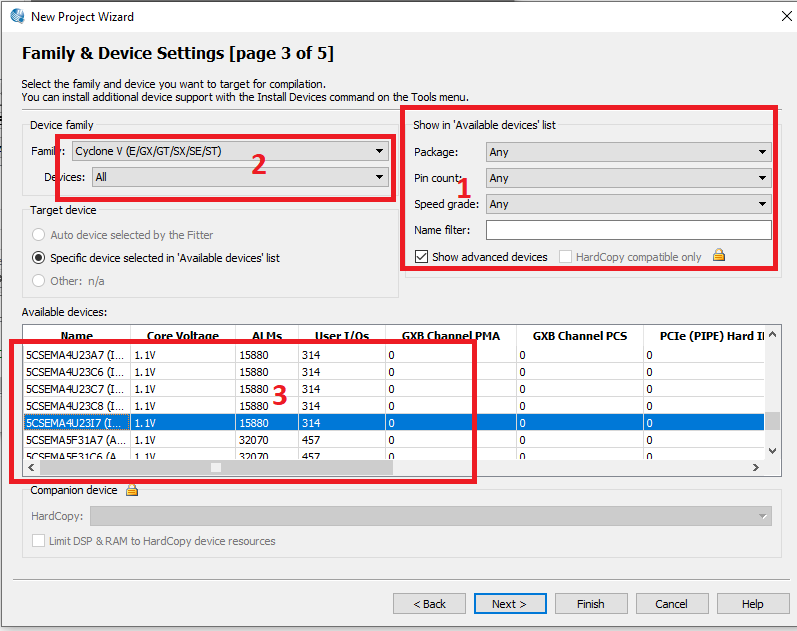
1 is used to filter from a huge list of programmable devices
2 is used to select the device family you want to program
3 selects the particular device, you want to program.
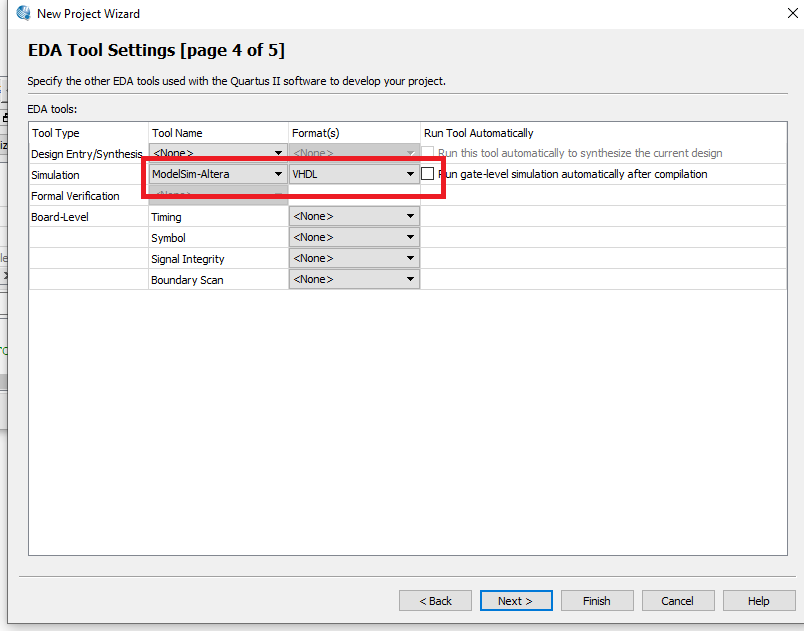
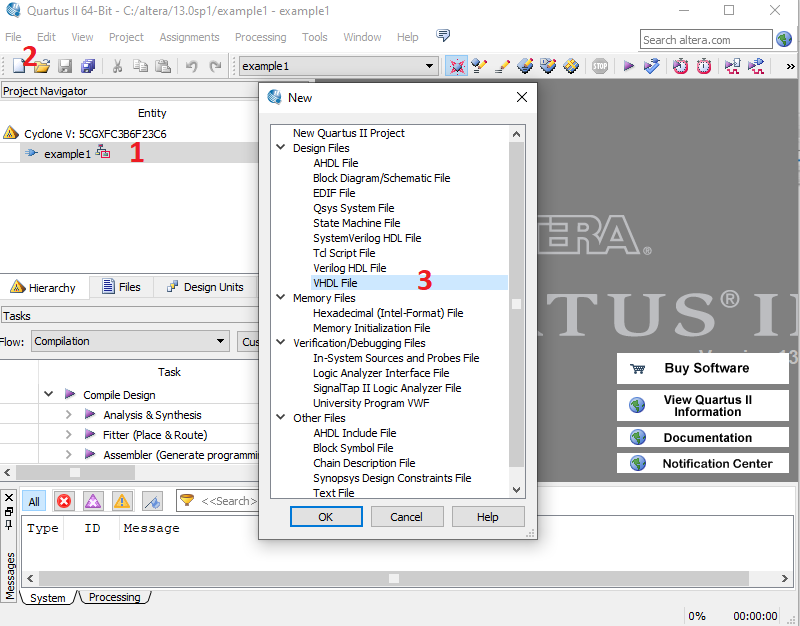
Now the project has been created, select the project and click on new
this time select the type of file to include in your project(Vhdl for this example)
A new file will be created , i will write a short code for this example
When you are done click on compilation button , figure below.
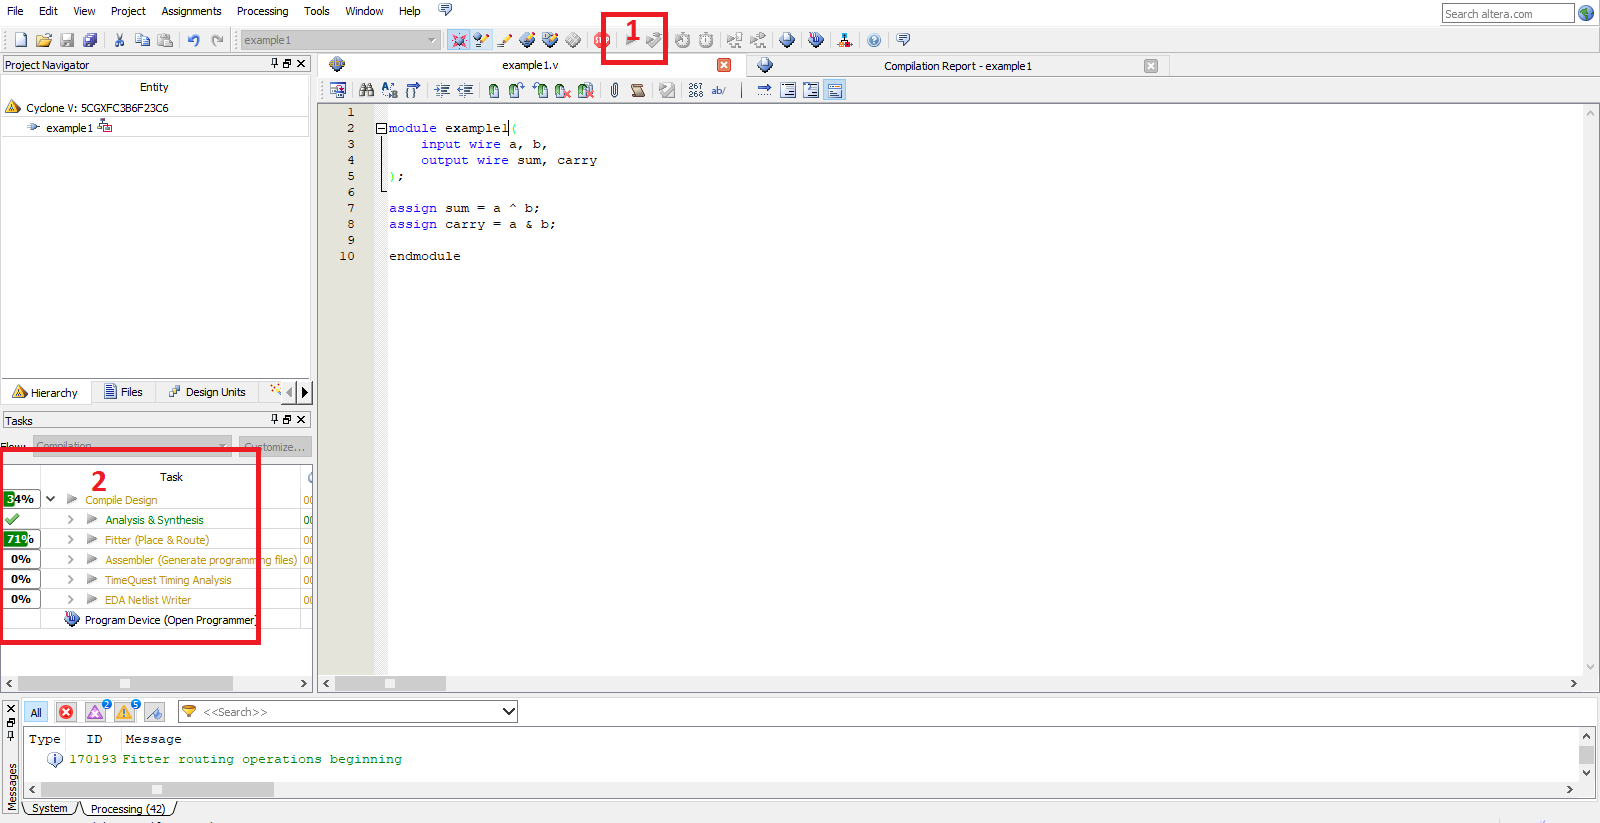
you may encounter compilation error if your top-level design is different from your module name(verilog) or entity name(Vhdl).
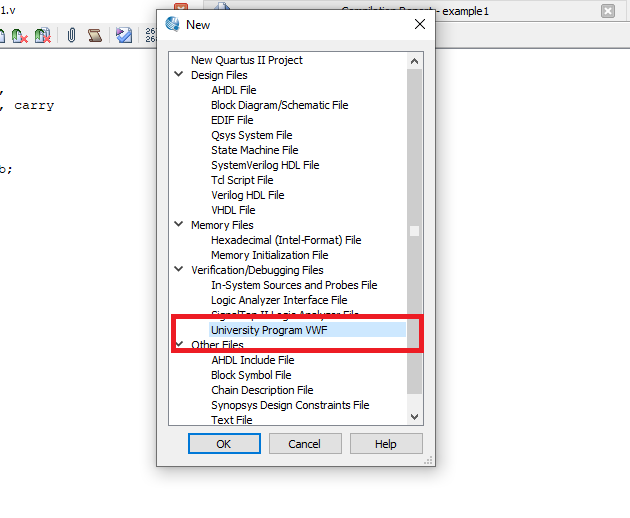
On success, lets simulate.
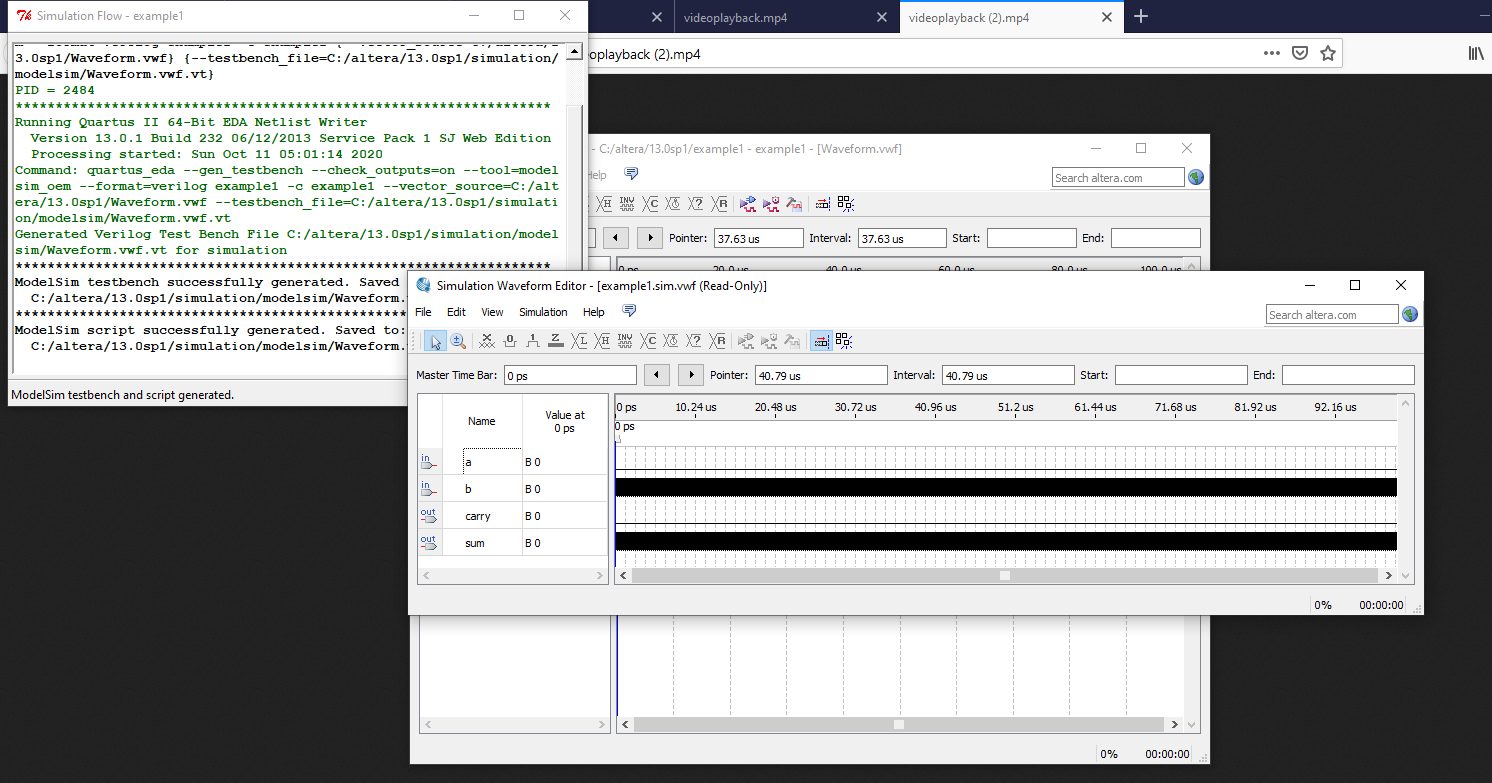
Select the new option and choose University VWF.You will get a blank VWF, click on Edit Insert Insert node or bus Node finder List.
A list input/output pins will appear, click on the " >>" sign to add these inputs to your simulation, and select ok and then ok, your inputs will input will now appear on the VWF.

If all is ok, you should get a window like the one above. Select "Edit" and click on grid you different values to change the size of the grids relative to time of propagation of the signal, you also set the end point which is duration of the signals. Select Edit and choose values and select count values to increment the signals to get different output waveforms.
On the simulation tab, choose functional simulation or generate modelsim test bench to output the test bench files. we will stop at simulation for this tutorial, during the course of our project inthe future chapter we will be able to run the code directly on our FPGA board.